
Achieving a flawless finish on your drywall is essential for creating a polished and professional look in any room. From hiding imperfections to adding visual interest, mastering drywall finishing and texturing techniques can elevate the appearance of your walls and ceilings. In this guide, we’ll delve into the intricacies of drywall finishing and explore popular texturing techniques to help you achieve stunning results in your home.
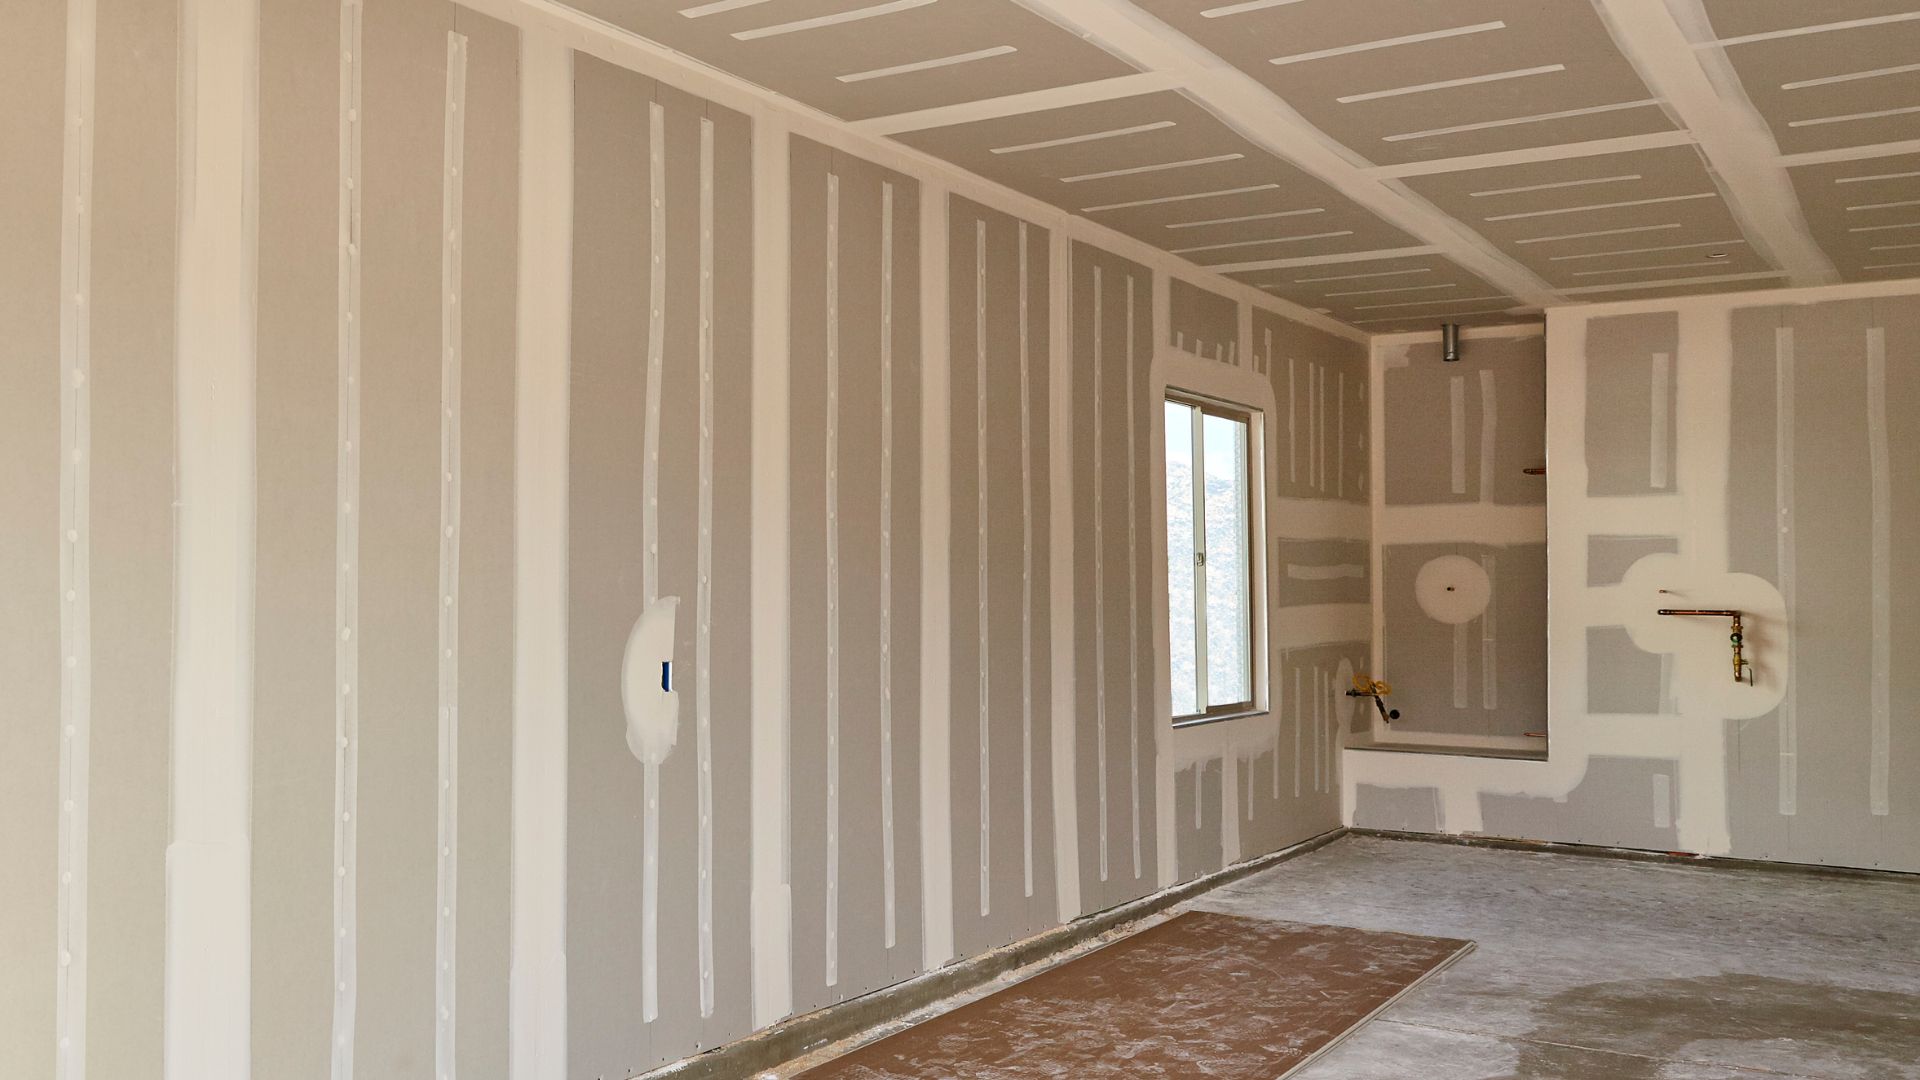
Understanding the process of drywall finishing is crucial for achieving smooth and seamless walls and ceilings. It involves applying joint compound, also known as mud, to the seams and screw or nail indentations in the drywall. Each step, from taping to mudding to sanding, plays a vital role in creating a flawless finish that will enhance the overall appearance of your space. Let’s dive deeper into the world of drywall finishing and explore the techniques and tools needed to master this essential skill.
Understanding Drywall Finishing
Drywall finishing is a multi-step process that begins with taping the seams between drywall panels to create a smooth transition. This is followed by applying joint compound over the taped seams and screw or nail indentations. The compound is then smoothed out and feathered at the edges to create a seamless surface. Multiple coats of compound may be applied, with sanding between each coat to achieve a smooth finish.
To begin the drywall finishing process, you’ll need a few essential tools and materials, including taping knives, joint compound, sandpaper, and a sanding block. Taping knives come in various sizes, with wider knives used for applying compound over larger areas and narrower knives for detail work. Joint compound, also known as mud, is available in pre-mixed or powdered form and acts as the primary material for finishing drywall. Sandpaper and a sanding block are essential for smoothing out the compound and achieving a seamless finish. With the right tools and techniques, you can master the art of drywall finishing and create flawless walls and ceilings in your home.
Popular Drywall Texturing Techniques
Drywall texturing adds depth and visual interest to walls and ceilings, while also helping to disguise imperfections and flaws. There are several popular texturing techniques, each with its own unique appearance and application method. The orange peel texture, for example, creates a subtle, bumpy surface reminiscent of an orange peel. The knockdown texture, on the other hand, involves applying a splatter texture and then flattening it with a trowel or knife to create a smoother finish. Other popular textures include skip trowel and popcorn, each offering its own distinctive look and feel.
To apply drywall texture, you’ll need specialized tools and materials, including a texture sprayer, texture brushes or rollers, and texture compound. A texture sprayer allows for even application of texture compound across large surfaces, while texture brushes or rollers can be used to create specific patterns or designs. Texture compound comes in various formulations, from lightweight to heavy, depending on the desired texture and application method. By experimenting with different techniques and textures, you can add character and personality to your walls and ceilings, transforming your space into a work of art.
Step-by-Step Guide to Drywall Finishing
- Prepare the Surface: Begin by ensuring that the drywall surface is clean and free of dust or debris. Use a damp cloth to wipe down the walls and remove any dirt or residue.
- Apply Joint Compound: Using a taping knife, apply a thin layer of joint compound over the taped seams and screw or nail indentations. Press the compound firmly into the seams, ensuring full coverage.
- Embed Drywall Tape: Place drywall tape over the wet compound, pressing it into the compound with the taping knife. Smooth out any air bubbles or wrinkles in the tape to ensure a tight seal.
- Apply Additional Coats: Once the tape is embedded, apply additional coats of joint compound over the seams and indentations. Feather the edges of each coat to blend with the surrounding surface.
- Sand Between Coats: After each coat of compound has dried, sand the surface smooth using fine-grit sandpaper or a sanding block. This will remove any imperfections and create a smooth finish.
- Finish with Primer and Paint: Once the final coat of compound has been applied and sanded smooth, prime the surface to seal the drywall and prepare it for paint. Apply a coat of paint to achieve the desired color and finish.
By following these steps and using the right tools and materials, you can achieve professional-quality results and create flawless walls and ceilings in your home.
Step-by-Step Guide to Drywall Texturing
- Prepare the Surface: Start by ensuring that the drywall surface is clean and free of dust or debris. Use a damp cloth to wipe down the walls and remove any dirt or residue.
- Mix Texture Compound: Depending on the desired texture and application method, mix the texture compound according to the manufacturer’s instructions. Add water as needed to achieve the desired consistency.
- Apply Texture with Sprayer: Using a texture sprayer, apply the texture compound evenly across the surface of the drywall. Hold the sprayer at a consistent distance from the wall to ensure even coverage.
- Adjust Texture: Once the texture compound has been applied, use a texture brush or roller to create the desired pattern or design. Experiment with different techniques to achieve the desired look and feel.
- Allow to Dry: Allow the texture compound to dry completely according to the manufacturer’s instructions. This may take several hours or overnight, depending on the type and thickness of the texture.
- Prime and Paint: Once the texture compound has dried, prime the surface to seal the texture and prepare it for paint. Apply a coat of paint to achieve the desired color and finish.
By following these steps and experimenting with different techniques, you can add depth and visual interest to your walls and ceilings, creating a unique and personalized look in your home.
In conclusion, mastering drywall finishing and texturing techniques can significantly enhance the appearance of your home’s interior surfaces. Whether you’re repairing damaged walls or starting from scratch with new construction, understanding the steps involved and having the right tools and materials at your disposal is essential for achieving professional-quality results. By following the step-by-step guides outlined in this article and experimenting with different textures and techniques, you can transform your walls and ceilings into works of art that showcase your unique style and personality.
If you’re feeling overwhelmed by the prospect of tackling drywall finishing and texturing projects on your own, don’t hesitate to reach out to CareKter Design & Remodeling for assistance. Our team of experts is here to provide guidance, support, and professional services to help you achieve your drywall goals. Whether you need help with repairs, renovations, or custom texture designs, we have the expertise and resources to bring your vision to life. Contact us today to learn more about our services and how we can help you achieve the perfect finish for your home.